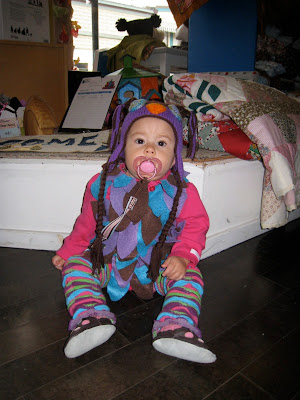
I had a few ideas in my head of how I was going to go about this, since 1. I don't sew. I could but I don't really know my way around a sewing machine without some help and that was more than I really wanted to attempt. And 2. I don't knit or crochet.
Anyways back to the ideas....I wanted a hat knitted of basically an Owl face. My best friend was awesome enough to offer up her services for me and whipped out a hat in like a day! The next idea was to basically take a onesie and some felt and create an owl body. I had bought some leg warmers right before starting this project and they were perfect for her costume, so I used the colors of those to figure out the rest of the costume.
Fair Warning: This is my very first DIY post of any kind, so please bear with me as I go through everything. Also the photos are not great quality, I think I took them around 10 at night as I was making the costume.
What You Need:
Onesie
Felt or patterned fabric in 2 or 3 colors. I used Purple, Teal and Brown Felt.
Fabric Glue
Scissors
Scrap cardstock, paper, or anything you can use to draw out your pattern
Legwarmers and tights
So here's what I did for my No Sew DIY Owl Costume:
Start by drawing your pattern on cardstock or something similar and then cut out your pattern to determine the size of your feathers.
I went with the larger size.
Use the feather pattern to cut out all your feathers.
Mine aren't all the exact same size, I feel it gives it more character when they're all a little different.
Put your extra carstock inside the onsie in case your glue seeps through the fabric.
Starting at the bottom of the onsie determine how you want your colors.
I tried to make it so none of the colors would be right next to each other or on top of each other.
Glue only at the top of the feathers right along the straight edge. That way your feathers won't be stiff and can have some movement. I overlapped the feathers just slightly and as you can see none of them are really centered right over the other.
Keep gluing...
And gluing...
And gluing...until you get all the way to the top!
And the costume couldn't be complete until it had a tail! I took the rest of the brown felt and cut out a giant tail that I folded in half and cut little scallops out of each end. Then I took the remaining purple and blue feathers, folded the brown tail in half and glued the feathers inside of it and glued it to the booty of the onesie!
So here is the result!!


love it! you did such a good job =)
ReplyDeletehttp://iamblissfullyloved.blogspot.com/
Adorable!!
ReplyDelete